
With Logi RoomMate you can turn your Artome to a complete Teams Rooms / Zoom Rooms system on wheels. You will get a fully integrated movable hybrid conferencing room solution combined with professional audio and projection.
What you will need
- Artome unit (with HybriDock USB connectivity)
- Logi RoomMate appliance
- Logi Tap control panel with connection kit (or an alternative control method)
- HDMI cable
- USB-B to USB-A cable
- Logitech conferencing camera (or a supported USB camera)
- USB cable for camera
- XLR microphone
- Network connection — wired Ethernet or Wi-Fi credentials
- Microsoft Teams Rooms or Zoom Rooms room account
Setup Instructions
Install the Logi RoomMate
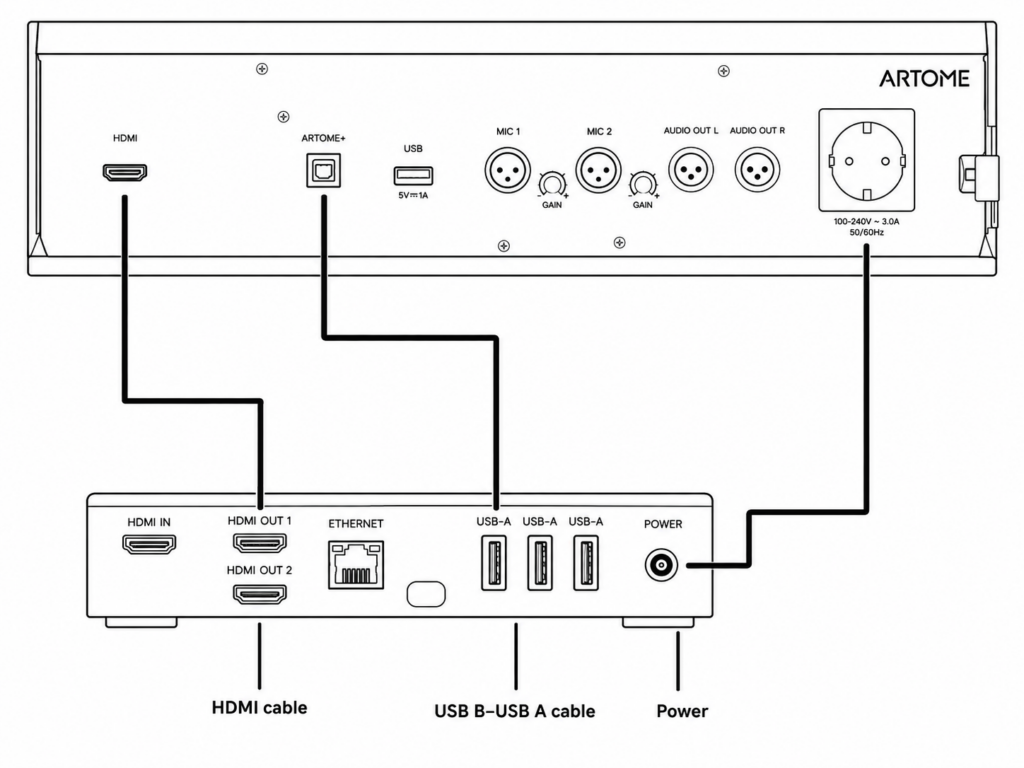
Place the Logi RoomMate on the cart’s rack shelf. Connect the following cables:
- Plug the HDMI cable into HDMI OUT port of Logi RoomMate an the other end into HDMI IN of the Artome unit.
- Plug the USB B – USB A cable into any of the USB-A ports of Logi RoomMate an the other end into ARTOME+ of the Artome unit.
- Use the Artome power socket to power the RoomMate.
Connect the camera
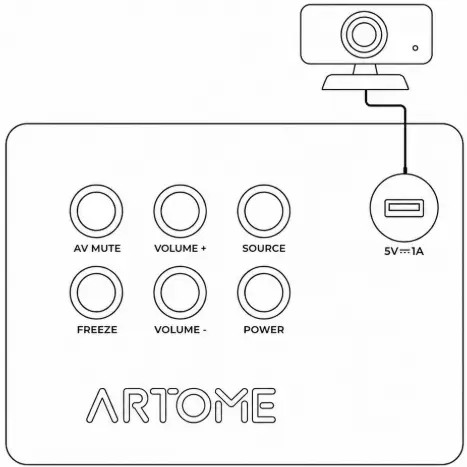
- Use the USB cable to connect the camera to the top USB port of the Artome unit. You can utilize a magnetic camera leg to position the camera on top of the Artome unit.
Connect a microphone
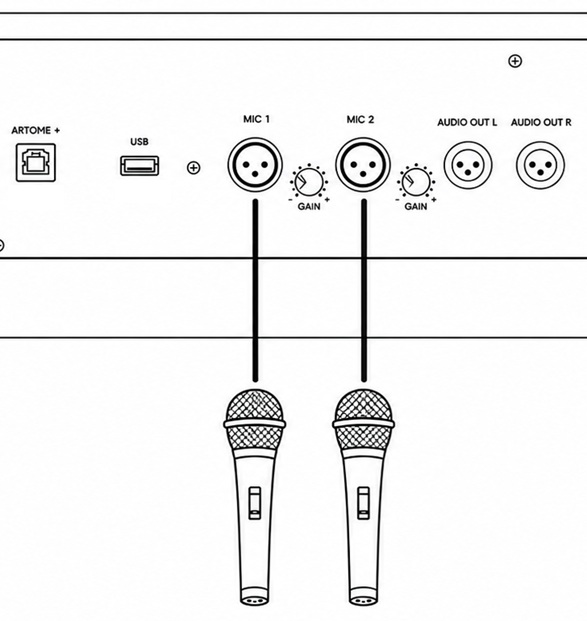
- Any microphone connected to Artome’s MIC1 and MIC2 XLR ports will transfer all audio to the RoomMate system in addition to Artome’s local speakers.
Connect the Tap panel
- Connect the Logitech Tap panel to the RoomMate unit.
- If the panel is located away from Artome, use one of the cable grommets to run the cable outside the unit.
Connect to the network
Choose one of the following:
- Wired: Plug an Ethernet cable into the LAN port on the back of the Logi RoomMate and connect it to your network switch or router.
- Wi-Fi: You can set this up during the initial software setup.
Initial RoomMate software setup
Press the power button from Artome button panel to power on the Artome unit.
The setup screen will appear on the Artome display.
- Go through the initial setup.
- Connect to a wired or wireless network.
- Connect your Teams / Zoom room account.
- Name the room.
Verify audio and video
Once setup is complete, confirm everything is working:
- The camera image appears on the Artome display in the conferencing app.
- Selected audio device for microphone and speakers is Artome HybriDock
If audio is not working, go to Settings → Device Settings in Teams or Zoom and confirm the correct speaker and microphone are selected.
Additional Information
On the Artome unit
Speaker EQ: Adjust Bass (low frequencies) and Treble (higher frequencies) to match the room’s acoustics — making speech clearer or media playback richer.
Volume Limits: Set a Startup Volume so the system always begins at a consistent level, and a Max Volume to prevent audio from being turned up too high.
Disable the HDMI CEC / HDMI Link from the projector settings to prevent RoomMate’s presence sensing to wake up the Artome unit.
On the Logi RoomMate
Logi Sync: Register the RoomMate to manage firmware updates, monitor device health, and configure settings remotely.
Camera framing: Use the RightSight auto-framing feature (if supported by your camera) to keep participants in frame automatically during calls.
Screen share: Use the HDMI IN port on the RoomMate to allow a laptop to share content directly into the meeting from the room.